How to Build a Smart Car Parking System with Arduino: A Step-by-Step Guide
Description:
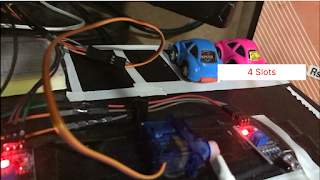
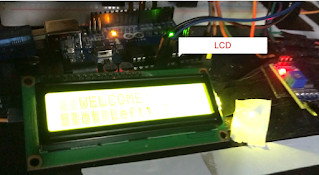
Learn how to build a Smart Car Parking System using Arduino. This DIY project uses I2C LCD displays, IR sensors, and a servo motor to automate parking gate control and slot monitoring. In this tutorial, we’ll guide you through setting up the system and scanning for I2C devices, helping you develop an efficient parking system from scratch.
Step 1: Components Required
Before starting the project, ensure you have the following components:
- Arduino UNO x1
- IR Sensors x2 (for car detection)
- Servo Motor x1 (for gate control)
- I2C LCD Display (16x2) x1 (for slot status display)
- Breadboard (optional, for clean wiring)
- Jumper Wires (Male-to-Male)
Step 2: Understanding the I2C Scanner Code
Before we connect the LCD display, we need to determine its I2C address using an I2C Scanner. Every I2C device has a unique address that the Arduino uses to communicate with it. The following code will help scan and find the I2C address of the LCD display or any other I2C device.
I2C Scanner Code:
#include <Wire.h>
void setup() {
Wire.begin();
Serial.begin(9600);
Serial.println("\nI2C Scanner");
}
void loop() {
byte error, address;
int Devices;
Serial.println("Scanning...");
Devices = 0;
for(address = 1; address < 127; address++ ) {
Wire.beginTransmission(address);
error = Wire.endTransmission();
if (error == 0) {
Serial.print("I2C device found at address 0x");
if (address < 16)
Serial.print("0");
Serial.print(address, HEX);
Serial.println(" !");
Devices++;
} else if (error == 4) {
Serial.print("Unknown error at address 0x");
if (address < 16)
Serial.print("0");
Serial.println(address, HEX);
}
}
if (Devices == 0)
Serial.println("No I2C devices found\n");
else
Serial.println("done\n");
delay(5000);
}
How to Use the I2C Scanner:
- Upload the Code: Upload the above code to your Arduino UNO.
- Open the Serial Monitor: After uploading, open the serial monitor at 9600 baud rate.
- Scan for Devices: The scanner will begin searching for I2C devices connected to your Arduino. It will display the device address in hexadecimal format (e.g.,
0x27).
- Note the I2C Address: This address is essential for configuring the LCD display in the next steps.
0x27).Step 3: Wiring the Parking System Components
- Now that we have the I2C address of the LCD, we can wire up the parking system components, including the IR sensors, servo motor, and LCD display.
Connections:
IR Sensors:
- IR1 (Entry Detection):
- VCC → Arduino 5V
- GND → Arduino GND
- OUT → Arduino Pin 4
- IR2 (Exit Detection):
- VCC → Arduino 5V
- GND → Arduino GND
- OUT → Arduino Pin 7
Servo Motor (Gate Control):
- VCC → Arduino 5V
- GND → Arduino GND
- Signal → Arduino Pin 9
I2C LCD Display:
- SDA → Arduino A4
- SCL → Arduino A5
- VCC → Arduino 5V
- GND → Arduino GND


0 Comments